Journal > Encrypt and Dither Photos in Hugo
Posted 2024-02-06
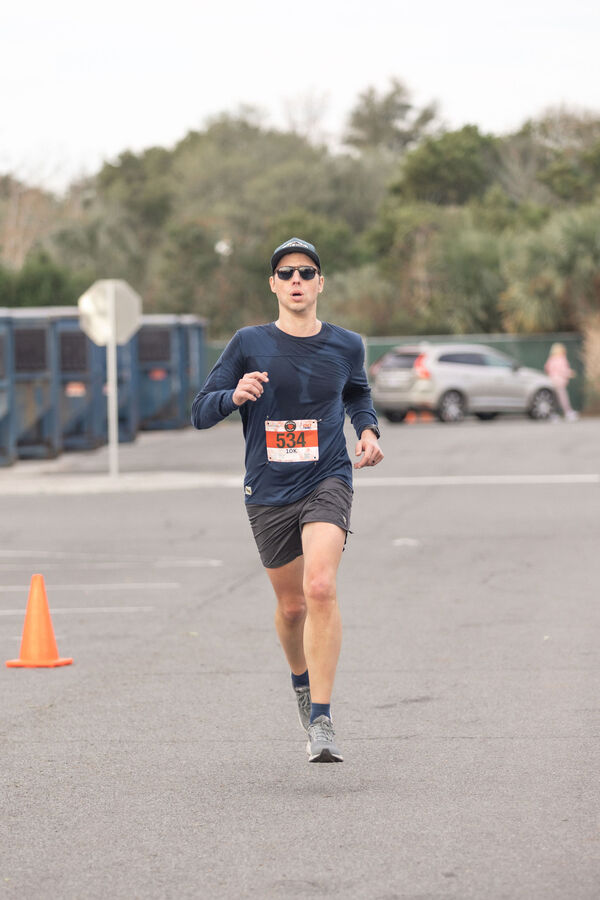
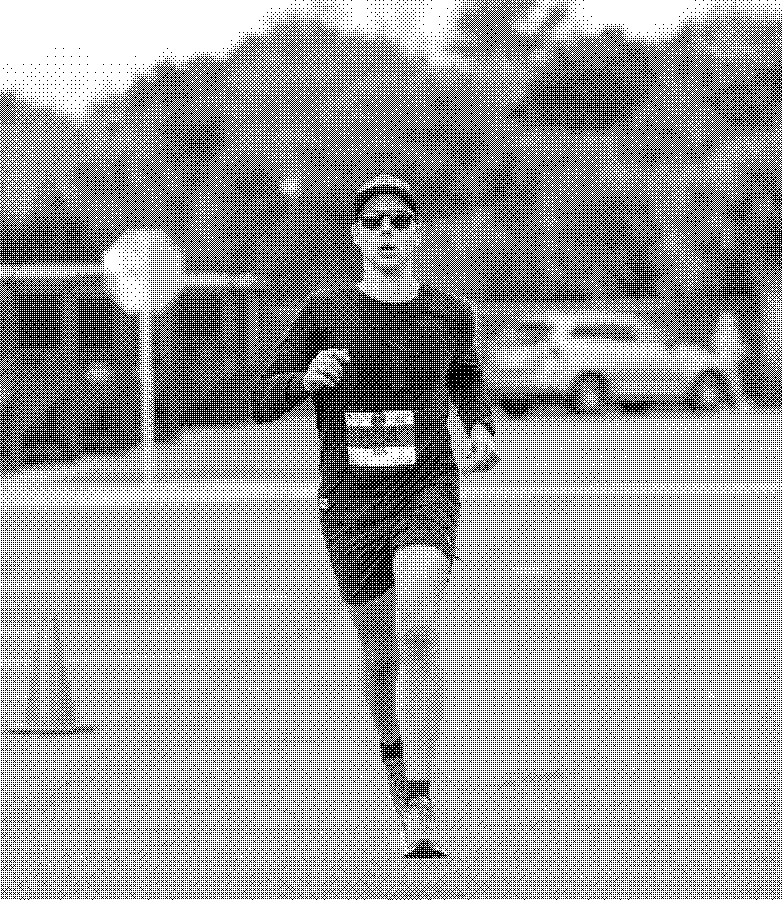
I encrypted all the photos on this site and wrote a tiny image server that decrypts and dithers the photos, then created a Hugo shortcode to display dithered images in posts. It keeps high-res photos of my kid off the web, and it looks cool.
Update 2024-02-12: Hugo will support native dithering in the next release. If you’re after the lo-fi look and don’t need encryption, that’ll be a lot cleaner than the approach outlined below.
When I was first setting up this site, I considered giving all the photos a monochrome dithered treatment à la Low-tech Magazine. Hugo has impressive image manipulation functionality but doesn’t include dithering and seems unlikely to add it. I opted for full-color photos and went on with my life.
Most of what I post on this site are these monthly dispatches that start with what my family’s been up to in the last month and include several high-resolution photos. Last week, I was reading Elliot Jay Stocks’ “2023 in review,” and he’s adament about not posting photos of his kids. That inspired me to take another crack at getting dithered images working – I take a lot of joy out of documenting our family life, and low-res, dithered images strike a good balance between giant full-color photos and not showing people in photos at all. And to add another wrinkle: this site is open source, so I also needed to ensure that the source images wouldn’t be available on GitHub.
I tried treating the full-size images with ImageMagick on the command line and then letting Hugo resize the result, but I wasn’t happy with the output – there’s still way too much data in a dithered full-sized image, so when you scale it down, it just looks like a crappy black-and-white photo. Furthermore, the encoding wasn’t properly optimizing for two-color images and so the files were larger than I wanted.
I needed to find some way to scale the images to the appropriate size and then apply the dither. Fortunately, Hugo has the ability to fetch remote images, which got me thinking about a separate image processing service. After a late night of coding, I’ve got a solution I’m quite pleased with.
Here’s a picture of me, before and after dithering:
Read on for more details, and if you want to follow along, you’ll need to have Ruby installed (I recommend asdf if you’re on a Unix-y OS) as well as ImageMagick and OpenSSL.
1. Encrypt all images
We’ll use OpenSSL to encrypt our images (here’s a guide). First, we’ll generate a secret key (the -hex option gives us something we can paste into a GitHub secret later):
openssl rand -hex -out secret.key 32
Make a backup of the key and then gitignore it:
echo secret.key >> .gitignore
Then we’ll use the key to encrypt all the images in the content folder. I use an interactive Ruby shell for this sort of thing because I’m not very good at shell scripting:
Dir.glob("content/**/*.{jpg,jpeg,png}").each do |path|
  %x(
    openssl \
      aes-256-cbc \
      -in #{path} \
      -out #{path}.enc \
      -pass file:secret.key \
      -iter 1000000
  )
end
2. Build a tiny image server
I made a standalone image server using Sinatra and MiniMagick that takes a path to an encrypted image and an optional geometry string and returns a dithered image. I won’t paste the entire file here but it’s really pretty short and simple.
If you want to run it yourself, copy down everything in the bin/dither folder and then run the following:
> cd bin/dither
> bundle install
> ROOT=../../content \
  KEY=../../secret.key \
  bundle exec ruby dither.rb
Then, assuming you have an encrypted image at content/path/to/file.jpg.enc, you should be able to visit localhost:4567/path/to/file.jpg?geo=400x300 in your browser to see it working.
3. Create a Hugo shortcode to fetch dithered images
We need to tell Hugo where to find our image server, which we’ll supply with an environment variable. First, we’ll give Hugo access to DITHER_SERVER in config.toml:
[security.funcs]
getenv = ['DITHER_SERVER']
Then start Hugo like this:
DITHER_SERVER=http://localhost:4567 hugo server
Now we’ll create the shortcode (layouts/shortcodes/dither.html):
{{ $file := printf "%s%s" .Page.File.Dir (.Get 0) }}
{{ $geo := .Get 1 }}
{{ $img := resources.GetRemote (printf "%s/%s?geo=%s" (getenv "DITHER_SERVER") $file $geo) }}
{{ $imgClass := .Get 2 }}

<a href="{{ $img.RelPermalink }}">
  <img src="{{ $img.RelPermalink }}"
    width="{{ $img.Width }}"
    height="{{ $img.Height }}"
    class="{{ $imgClass }}"
  >
  {{ with .Inner }}
    <figcaption>
      {{ . }}
    </figcaption>
  {{ end }}
</a>
Adjust for your needs, but the gist is:
- Construct a URL from
DITHER_SERVER, the directory that the page lives in, the supplied file name, and the (optional) geometry string - Use
resources.GetRemoteto fetch the image - Display as appropriate
Use it like this:
{{<dither IMG_2374.jpeg "782x1200" />}}
4. Delete the unencrypted images from the repository
Now that everything’s working, let’s remove all the uncrypted images from the repository. It’s not enough to just git rm them, since they’d still be present in the history, so we’ll use git filter-repo to rewrite the history as if they never existed.
Dir.glob("content/**/*.{jpg,jpeg,png}") do |path|
  `git filter-repo --invert-paths --force --path #{path}`
end
5. Tweak site styles
The resulting images will be entirely black and white, and this site doesn’t use a pure white background color. We can improve the display of the dithered images with some CSS that sets mix-blend-mode to multiply:
img {
  mix-blend-mode: multiply;
}
The blacks will still show as black, but the whites will now be the background color of the site.
6. Update the deploy workflow
This site uses GitHub Actions to deploy on pushes to the main branch, and we need to make a few updates to our workflow to generate the static site with dithered images:
- Add the secret key as an Actions Secret
- Add workflow steps to
- Install Ruby and the required Gem dependencies
- Write the secret key to a file
- Start the dither server as a background task (i.e. with
&)
- Add the
DITHER_SERVERenvironment variable to the build step so that Hugo knows where to find it
Here’s the deploy workflow for this site for reference.
This was super fun to build, and I’m really happy with the result. It makes the local authoring and deploy processes a bit more complicated since we have to run the separate image server, but I think the result is worth it. Hope you found this interesting, and please reach out if you have any thoughts or questions.
References
- “Ditherpunk — The article I wish I had about monochrome image dithering — surma.dev”; backed up 2024-02-05 14:50:25 UTC
- “About the Solar Powered Website | LOW←TECH MAGAZINE”; backed up 2024-02-05 14:50:28 UTC
- “Elliot Jay Stocks | 2023 in review”; backed up 2024-02-02 15:51:48 UTC
- “Encrypt and decrypt a file using SSH keys”; backed up 2024-02-05 14:50:24 UTC